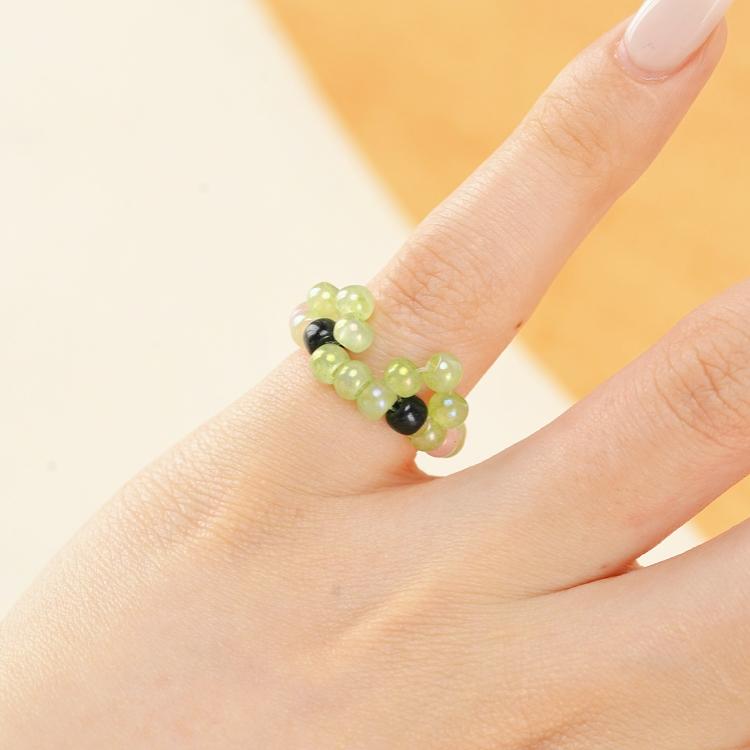
SEED BEAD
Cow Ring
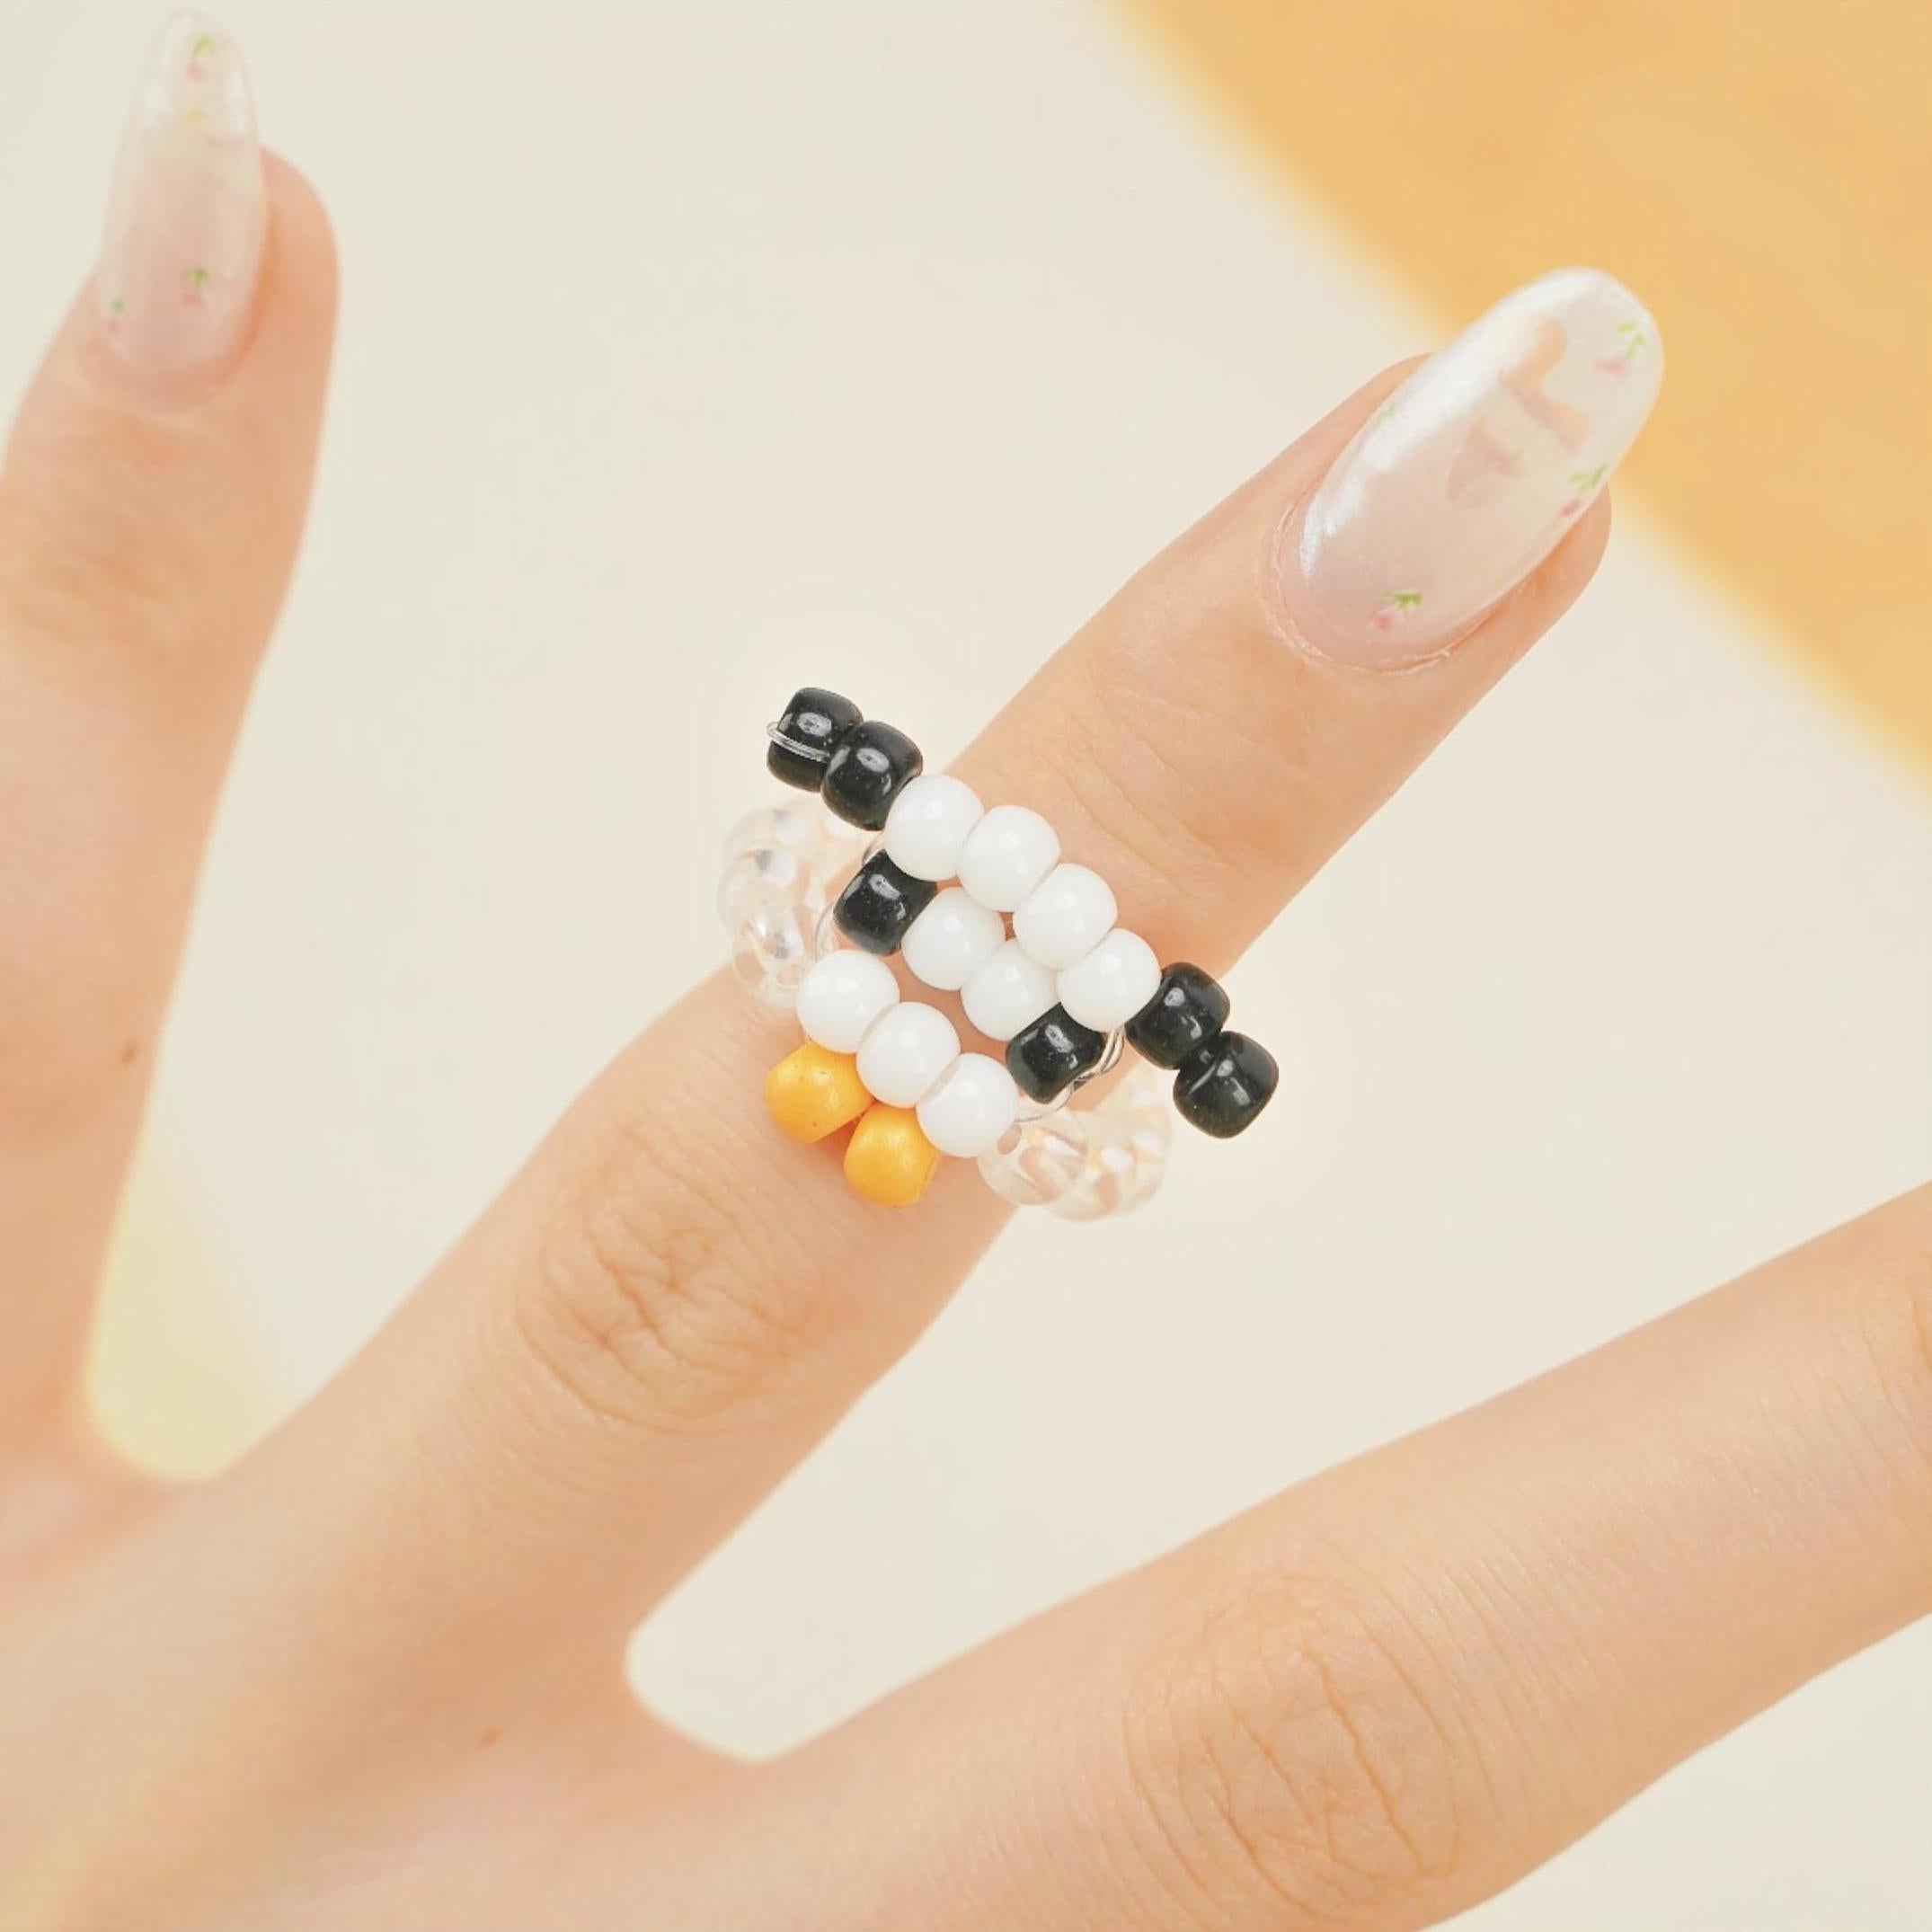
Looking to add a touch of whimsy to your jewelry collection? A handmade seed bead cow ring might be the perfect accessory to showcase your unique style! This easy-to-follow DIY guide will walk you through creating a fun and eye-catching cow-themed ring, With seed beads in black, white, and orange, this adorable ring design will make your jewelry collection stand out while celebrating your crafty skills.
Materials Needed for the Seed Bead Cow Ring
- Seed Beads: You will need the following for the cow’s face:
- 9 white seed beads (for the face and ears)
- 6 black seed beads (for the ears and eyes)
- 2 orange seed beads (for the nose)
- Ring Band Beads: Choose additional seed beads to form the band. The total number will vary depending on your finger size.
- Beading Cord or Thread: Choose a flexible and durable beading thread that complements your beads.
- Needle: This can help with threading smaller seed beads if necessary.
Step-by-Step DIY Seed Bead Cow Ring Tutorial
Let’s dive into the creation process! Follow these steps to bring your cute cow ring to life:
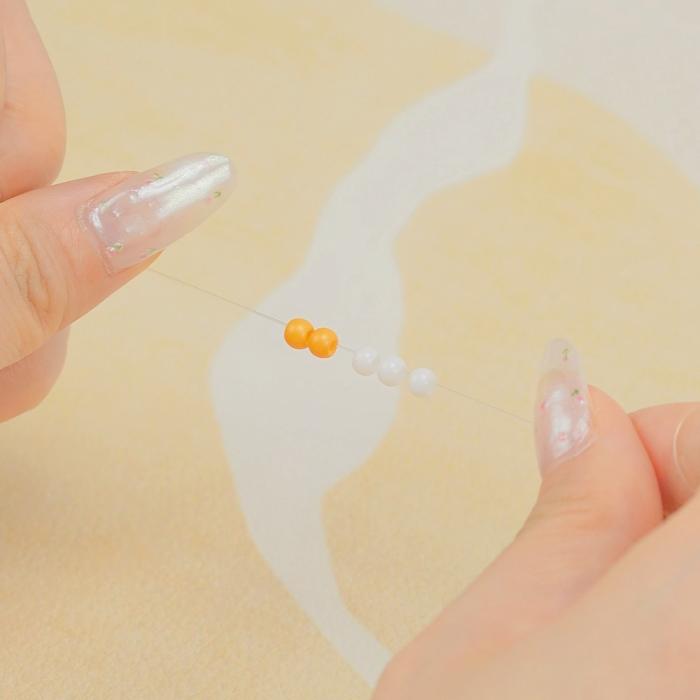
1. Start with the Cow’s Nose (Step 1)
Thread both ends of your beading cord through two orange seed beads. These will be the cow’s nose and should be centered on the thread.
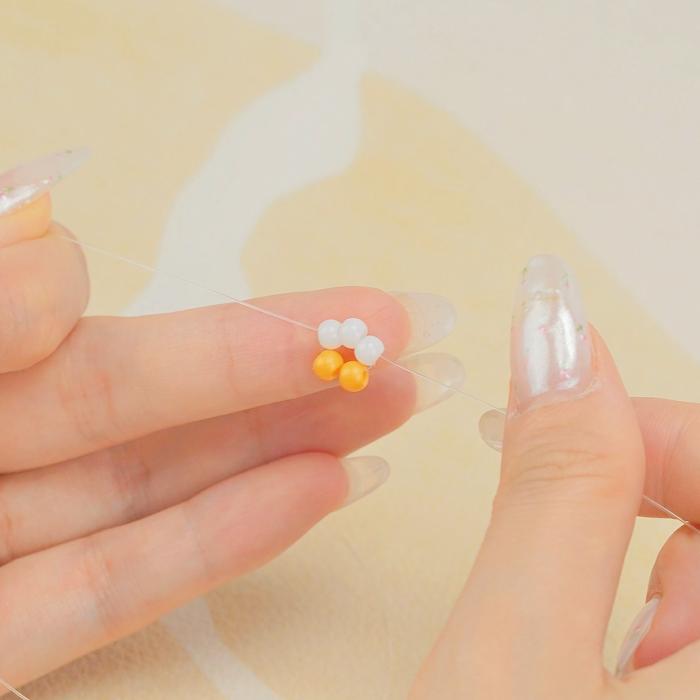
2. Form the Lower Part of the Face (Step 2)
Next, take both ends of the cord and thread them through three white seed beads. Pull the cords tight to position the beads directly above the orange beads.
1
2
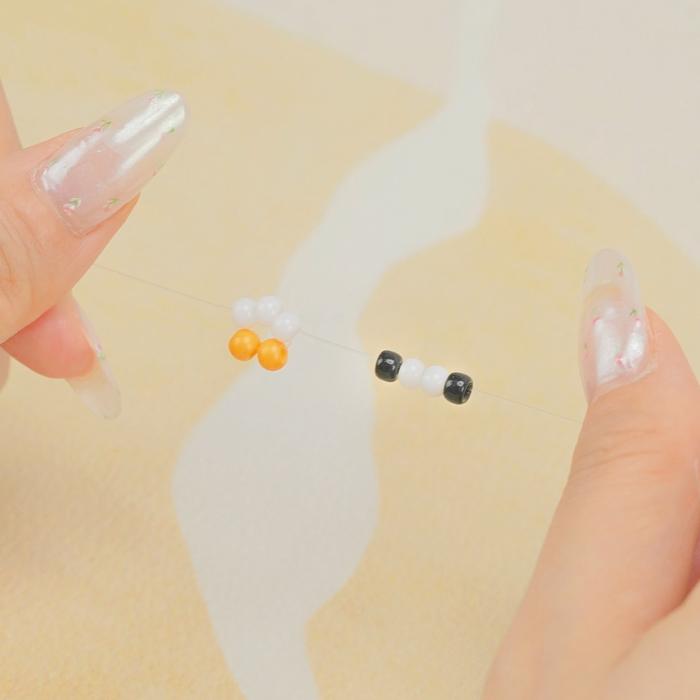
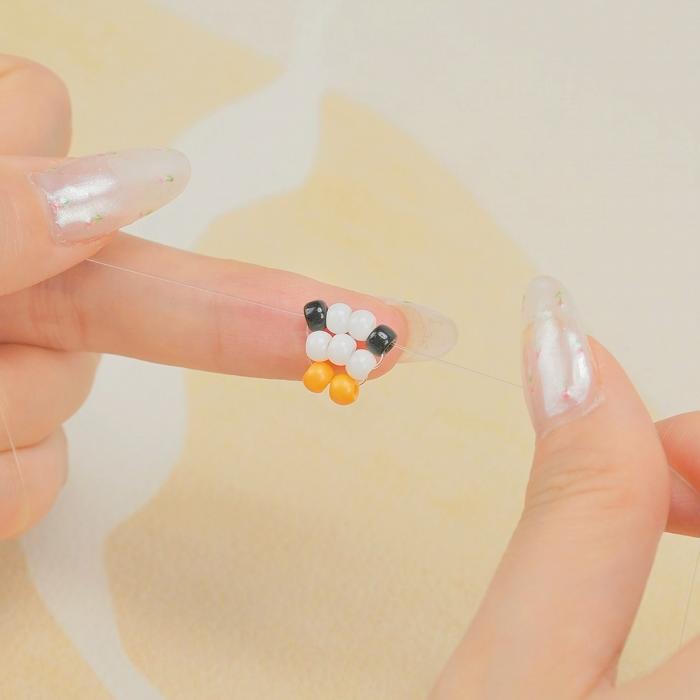
3. Add the Eyes and Middle of the Face (Step 3-4)
Thread both ends of the cord through the following beads:
- One black seed bead (for one eye)
- Two white seed beads
- One black seed bead (for the other eye)
This forms the middle section of the cow's face.
3
4
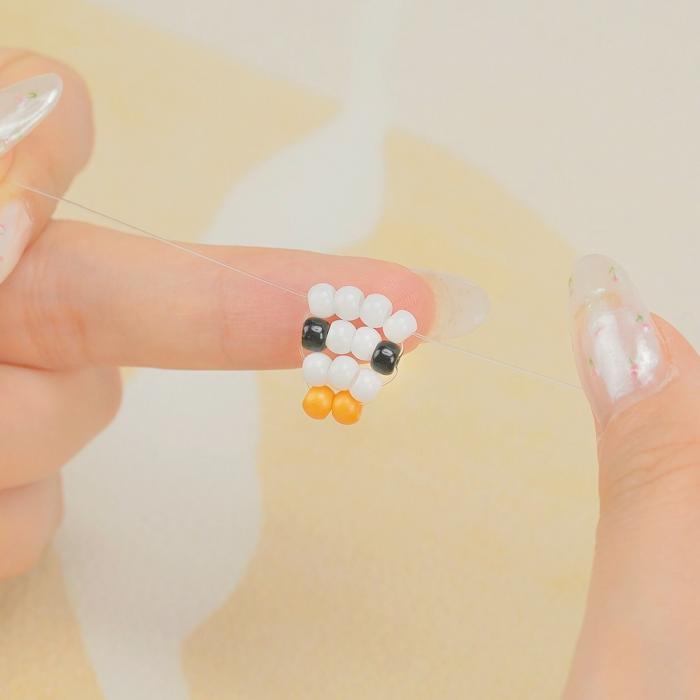
4. Finish the Top of the Face (Step 5)
Pass both ends of the thread throughfour white seed beads. This completes the cow’s face shape and ensures the head has a rounded look.
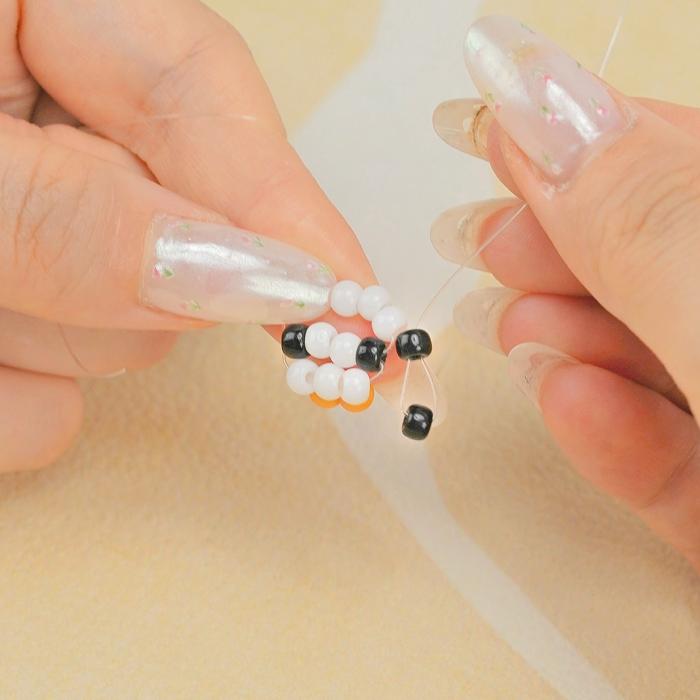
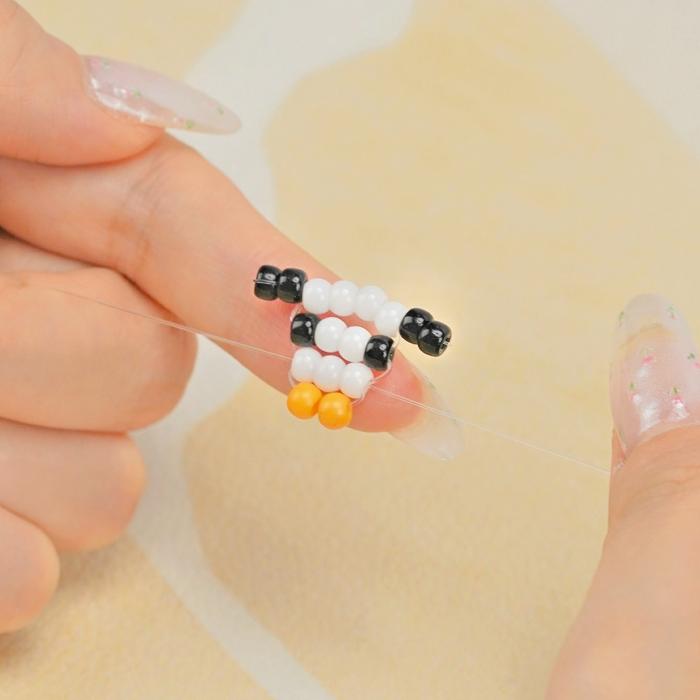
5. Create the Ears (Step 6-7)
On the right side of the cord, thread twoblack seed beads. Loop the cord back through the first black bead to form the cow's ear. Repeat this step on the left side for the second ear, ensuring the cow’s face has balanced ears.
5
6
7
6. Secure the Face and Adjust Shape (Step 8)
Gently pull the cords to adjust the beads and secure the cow's face. Make sure the beads are tight but not too rigid, allowing flexibility for the ring.
7. Bead the Ring Band (Step 9)
Now, start adding beads to form the band of the ring. Depending on your finger size, thread an appropriate number of white seed beads onto each end of the cord. Test the size by placing it around your finger to ensure a comfortable fit.
8. Finalize and Tie Off (Step 10)
Once you’ve added enough beads for the band, tie a knot with the cord to secure the ring. If possible, hide the knot by tucking it into one of the beads for a clean finish.
display
Enjoy Your Handmade Seed Bead Cow Ring!
Congratulations! You’ve just created an adorable Seed Bead Cow Ring. This playful accessory is perfect for wearing yourself or gifting to a friend who loves cute, handmade jewelry. The combination of black, white, and orange seed beads brings the cow design to life, adding charm to any outfit.
Expand Your Seed Bead Jewelry Collection
If you loved making this seed bead cow ring, why stop there? Try creating other seed bead jewelry pieces such as bracelets, earrings, or necklaces. The possibilities are endless when it comes to combining different seed bead colors and designs. Handmade jewelry allows you to express your creativity while crafting something truly unique.

