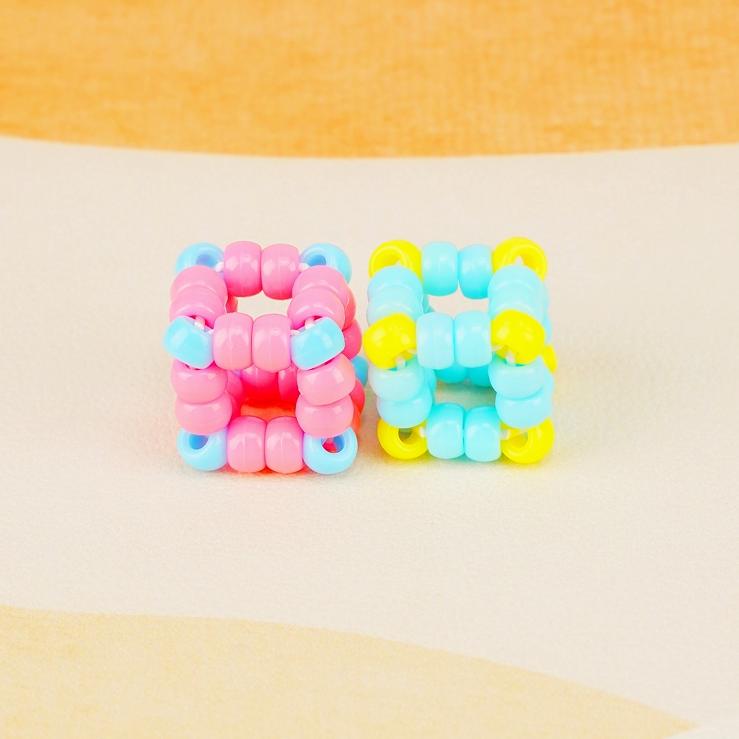
Pony Bead / Kandi Bead
Create Your Own Kitty Charm: A Step-by-Step Pony Bead Bracelet Tutorial
Crafting a Kitty Pony Bead Bracelet is a fun and creative way to express your love for cats while adding a unique accessory to your collection. This DIY bracelet is not only a delightful project for cat lovers but also a great way to explore friendship bracelet ideas. Perfect for gifting or wearing as a BFF bracelet, this tutorial guides you through each step to create a charming kitty bracelet using pony beads. With the right materials and a little patience, you'll have a piece that's both personal and playful.
Materials Needed:
To create your Kitty Pony Bead Bracelet, gather the following materials:
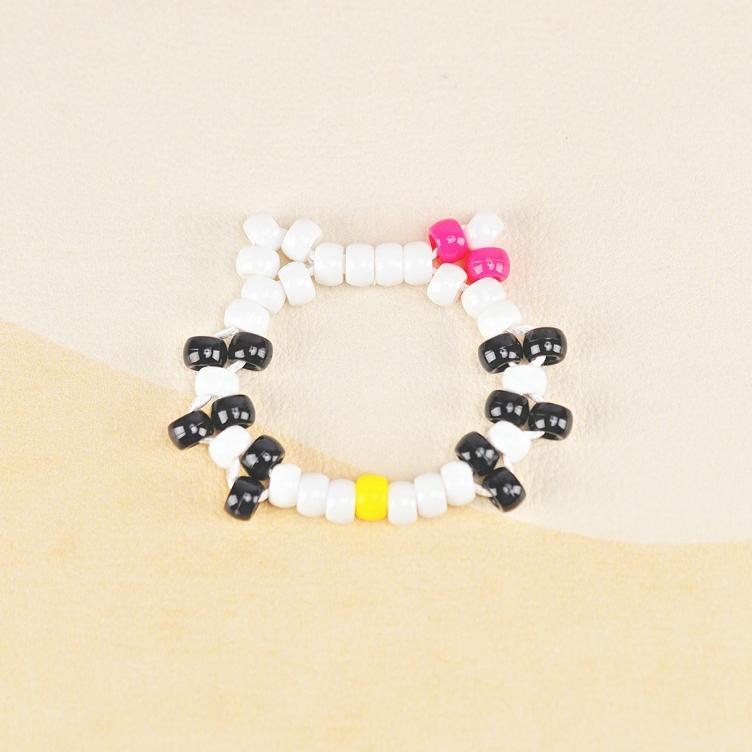
- 24 White Pony Beads: These form the main body and facial features of the kitty, offering a clean and classic look.
- 12 Black Pony Beads: Used to outline the kitty’s face and add definition to features like whiskers.
- 1 Yellow Pony Bead: This bead serves as the kitty’s nose, adding a small yet vibrant detail.
- 2 Pink Pony Beads: Representing the kitty’s ears, these beads give a cute and playful touch to your design.
- Nylon Cord or Elastic String: Choose a durable string that can withstand wear and tear, suitable for a bracelet that will be worn frequently.
- Scissors: Essential for cutting the string to the appropriate length.
- Tape or Bead Stopper: Helps secure the beads in place while you work on the bracelet.
Step-by-Step Instructions:
Step 1: Create the Kitty’s Outline
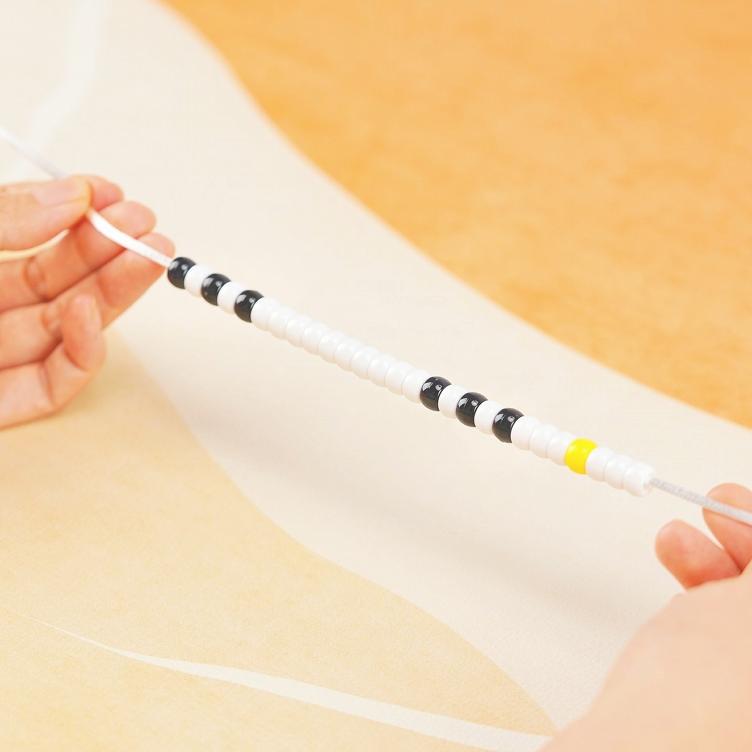
Cut a piece of string that’s long enough to comfortably wrap around your wrist, leaving extra length for tying knots. Secure one end of the string to your workspace with tape to prevent beads from sliding off. Begin threading the beads in the following order:
1 black pony bead, 1 white pony bead, 1 black pony bead, 1 white pony bead, 1 black pony bead, 10 white pony beads, 1 black pony bead, 1 white pony bead, 1 black pony bead, 1 white pony bead, 1 black pony bead, 3 white pony beads, 1 yellow pony bead, 3 white pony beads.
This sequence forms the basic outline of the kitty's face and body.
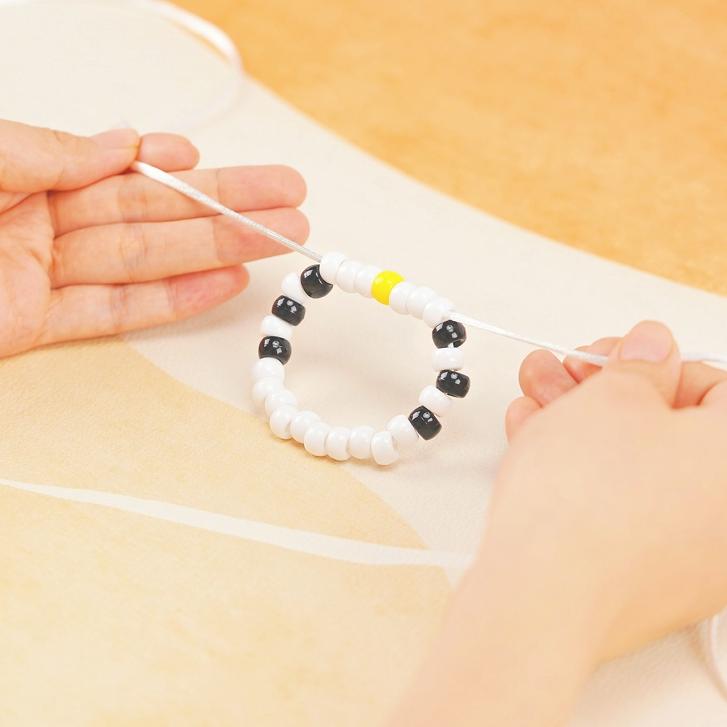
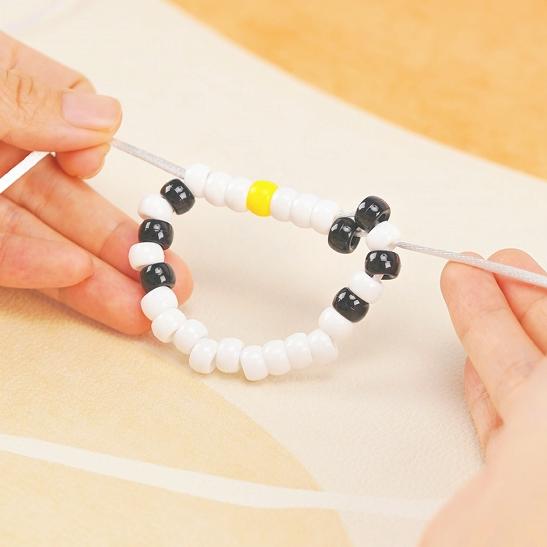
Step 2: Form the Kitty’s Chin
To define the kitty’s chin, take the other end of the string and weave it back through the top three white pony beads, the yellow pony bead, and the next three white pony beads.
1
2
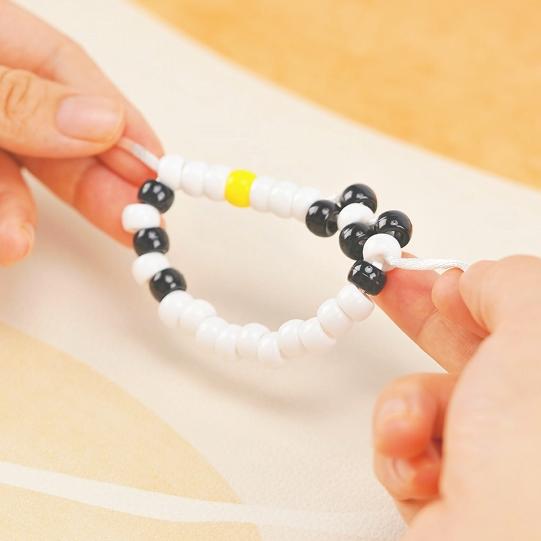
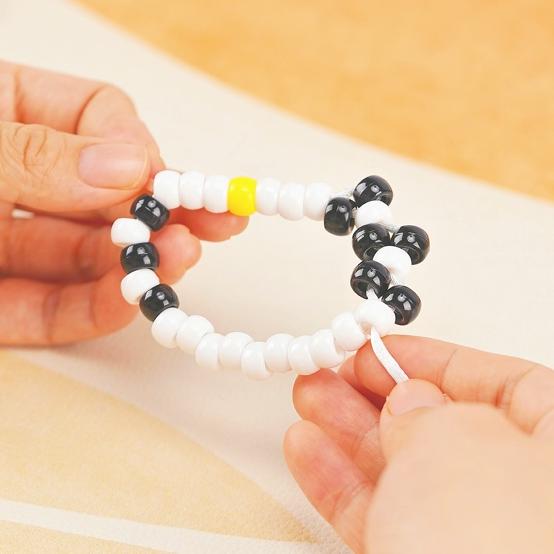
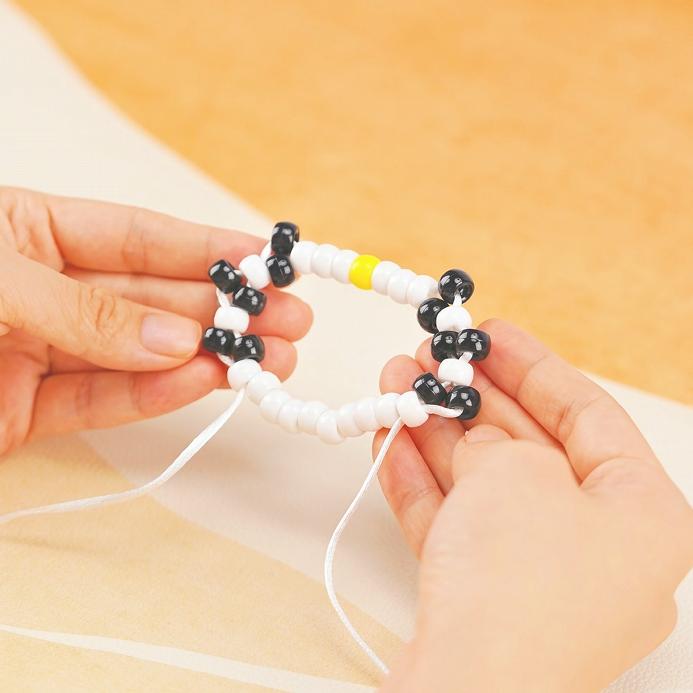
Step 3: Add the Kitty’s Whiskers
For the whiskers, thread one black pony bead onto both ends of the string, then pass each string through the next adjacent white pony bead. Repeat this process twice more to create three sets of whiskers on each side of the kitty’s face. This step adds character to your kitty, making it look more lifelike and cute.
3
4
5
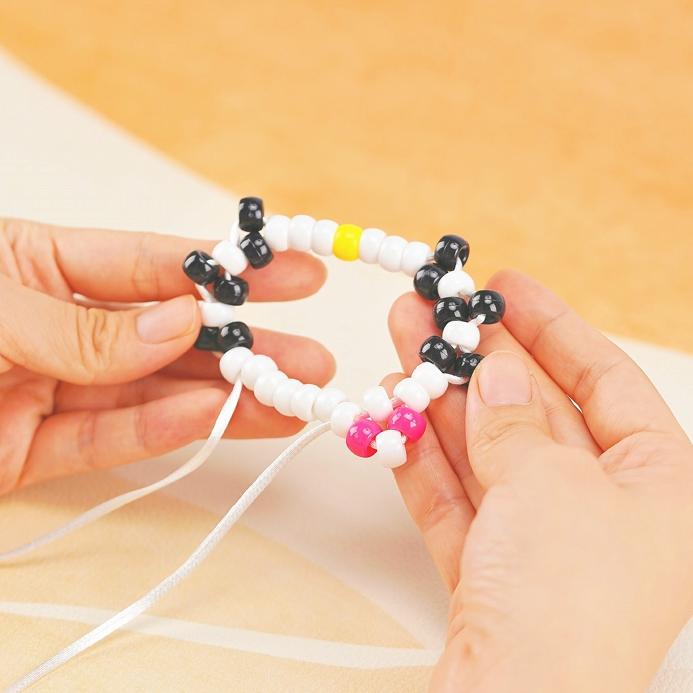
Step 4: Shape the Kitty’s Ears
To craft the kitty’s ears, thread both ends of the string through the next white pony bead. On the right string, add one pink pony bead, one white pony bead, and another pink pony bead. On the left string, add three white pony beads. Then, pass both ends of the string through the second white pony bead on each side. This forms the distinctive ears that give your kitty its adorable appearance.
Step 5: Complete the Bracelet
Finally, thread the remaining white pony beads onto the string, ensuring that the pattern is symmetrical on both sides. Tie the ends of the string together securely with a knot, trimming any excess string. If you want to ensure the knot stays secure, apply a dab of clear nail polish. Your Kitty Pony Bead Bracelet is now ready to wear or gift to a friend!
6
7
display
Additional Tips:
- Experiment with Colors: Don’t be afraid to try different color combinations for your kitty. For example, using gray and white beads can create a classic tabby look, while black and orange beads can give you a Halloween-themed kitty.
- Add Personalization: Consider adding a small charm or initial bead alongside the kitty to make the bracelet even more personalized. This could be your initial or your friend’s, making it a perfect BFF bracelet.
- Explore Other Designs: If you enjoyed making this bracelet, try creating other animals or characters using similar techniques. The possibilities are endless, and you can make matching sets with your friends.
Conclusion:
Making a Kitty Pony Bead Bracelet is a delightful way to combine creativity and crafting. This project is simple enough for beginners but allows for plenty of customization and personalization. Whether you’re looking to add to your collection of friendship bracelets, create a unique BFF bracelet, or simply enjoy a fun crafting session, this kitty bracelet is a perfect choice. So gather your beads, follow the steps, and enjoy the process of creating your very own kitty charm bracelet!